
예제의 결과물
준비물 & 결선 & 세팅하기
아래 링크를 참고해서 준비해주세요.
* 준비물 구입 링크
https://smartstore.naver.com/frontiers/products/5380911083
스마트폰제어 LED 간판 오픈 입구 전광판 아트사인 부동산 전광판 영업중 개업선물 카페 식당 :
스마트폰과 블루투스 연결을 통해 글자와 이미지를 마음대로 변경
smartstore.naver.com
소스코드 다운
iotfrontiers/popsign_examples (github.com)
GitHub - iotfrontiers/popsign_examples
Contribute to iotfrontiers/popsign_examples development by creating an account on GitHub.
github.com
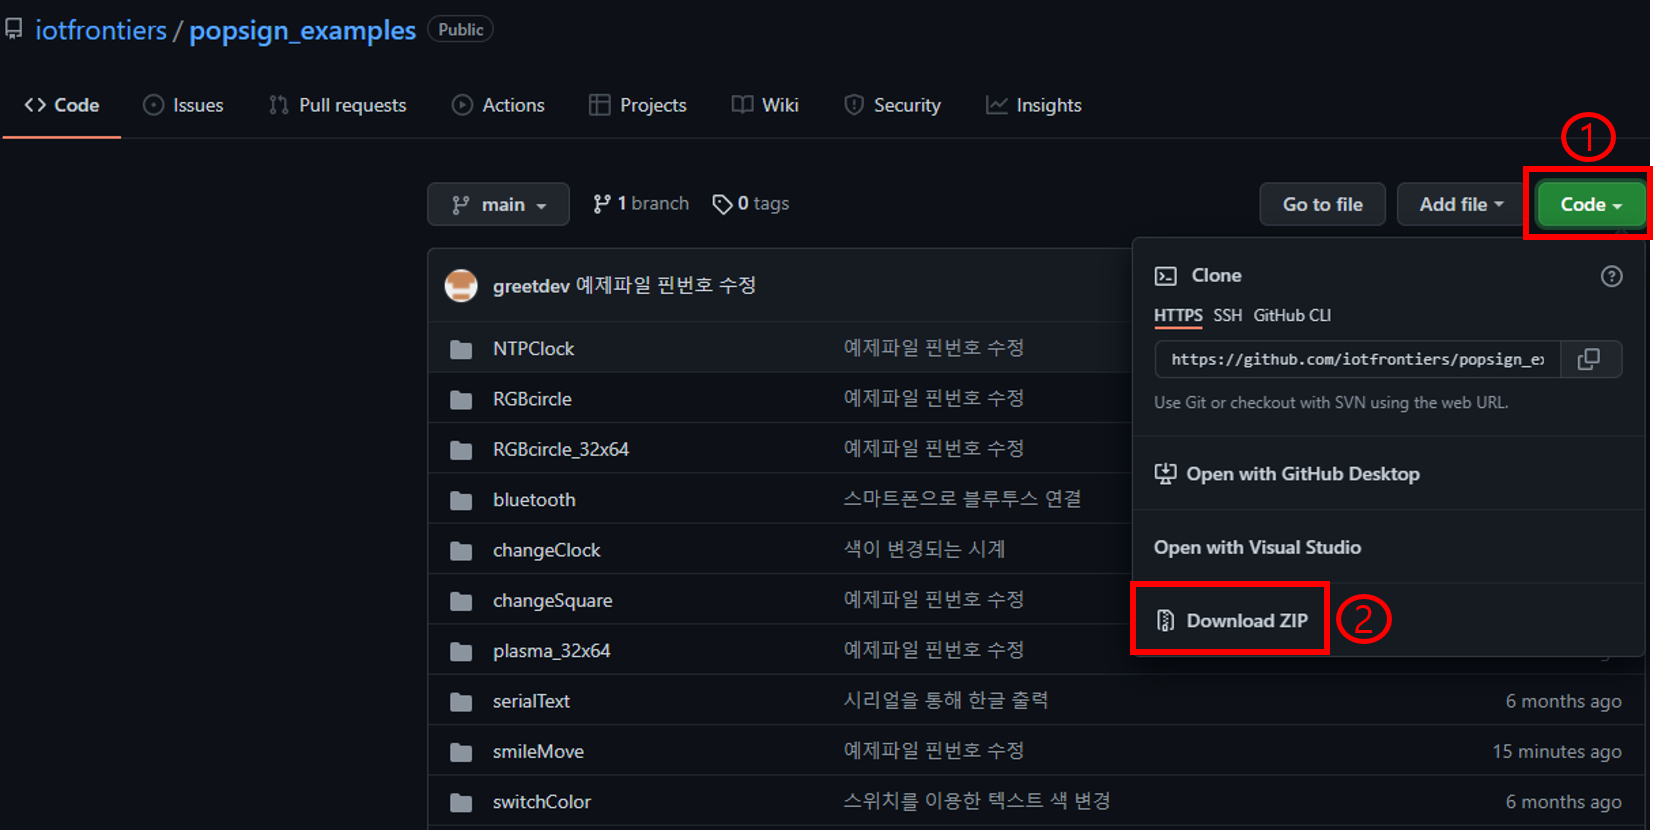
위 링크에 들어가셔서 연두색의 Code 버튼을 누르시고
Download ZIP 버튼을 누르면 전체 예제 파일을 다운 받을 수 있습니다.
업로드 준비
① 파일 - 열기 항목을 눌러서 현재 진행하고 있는 예제의 ino파일을 선택합니다.
② 보드와 PC를 USB C타입 케이블로 연결합니다.
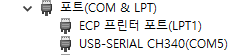
③ 장치관리자에서 보드가 연결된 포트를 확인합니다. USB-SERIAL-CH340 이라는 이름으로 표시되어 있습니다.
④ 위에서 확인한 포트번호를 IDE에 설정합니다

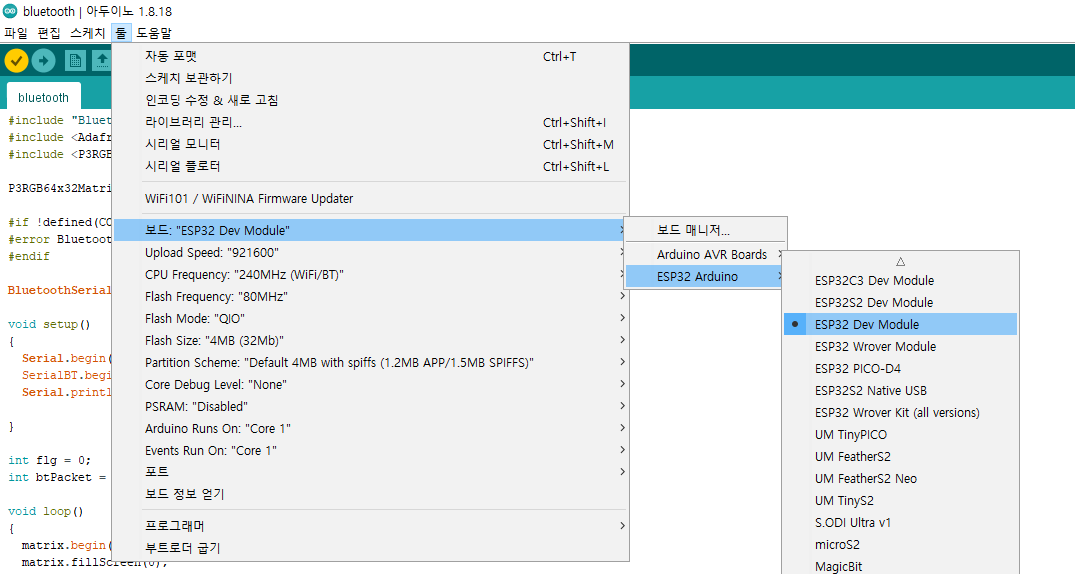
⑤ ESP-32 Dev Module 보드를 선택합니다.
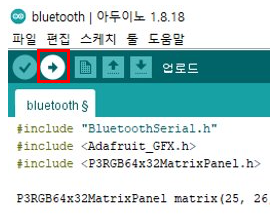
⑥ 업로드 준비가 다 되었습니다. 업로드 버튼을 눌러서 업로드 할 수 있습니다.
시리얼 모니터
스케치 우측상단 돋보기 모양을 선택하면 시리얼 모니터를 실행할 수 있습니다.
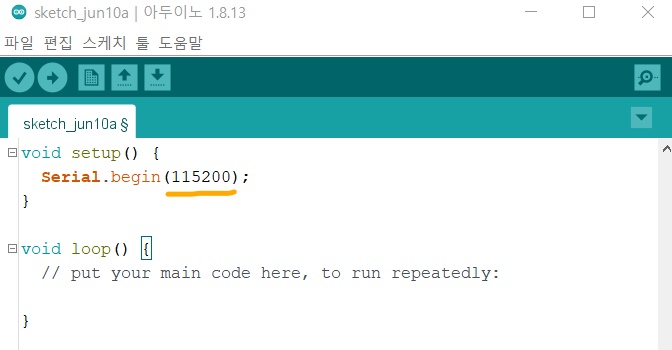
시리얼 모니터의 보드레이트를 코드상에서 설정한 보드레이트 (115200) 와 동일하게 설정해야 합니다.
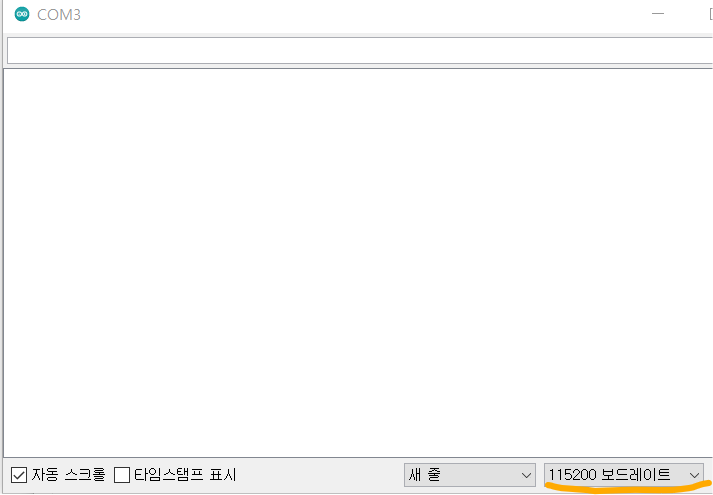
시리얼 모니터를 통해 보드가 컴퓨터로 보내는 내용을 볼 수 있고
전송 버튼 왼쪽에 있는 입력 창에 텍스트를 입력한 후 전송 버튼을 눌러서 보드로 내용을 전송할 수도 있습니다.
changeClock 소스코드
#include <WiFi.h>

#include <Adafruit_GFX.h>
#include <P3RGB64x32MatrixPanel.h>
#include <Fonts/FreeSans9pt7b.h>

P3RGB64x32MatrixPanel matrix(25, 26, 27, 21, 22, 0, 15, 32, 33, 12, 5, 23, 4);

char ssid[] = "frontier";
char pass[] = "front1202^^";


void setup(){
  Serial.begin(115200);

  Serial.print("Attempting to connect to Network named: ");
  Serial.println(ssid);                   // print the network name (SSID);

  WiFi.begin(ssid, pass);
  while (WiFi.status() != WL_CONNECTED) {
    Serial.print(".");
    delay(1000);
  }
  Serial.println("");
  IPAddress ip = WiFi.localIP();
  Serial.print("IP Address: ");
  Serial.println(ip);

  configTime(32400, 0, "ntp.nict.jp", "ntp.jst.mfeed.ad.jp"); // enable NTP
   matrix.begin();
}

int r = 0, g = 3 , b = 6;

void loop()
{
  if (WiFi.status() != WL_CONNECTED)
    ESP.restart();

  time_t t;
  static time_t last_t;
  struct tm *tm;
  static const char* const wd[7] = {"Sun","Mon","Tue","Wed","Thr","Fri","Sat"};

  t = time(NULL);
  if (last_t == t) return;    // draw each second
  last_t = t;
  tm = localtime(&t);
  matrix.fillScreen(0);

  matrix.setFont(&FreeSans9pt7b);
  matrix.setCursor(0, 13);
  matrix.setTextColor(matrix.color444(15, 15, 15));

  matrix.printf("%02d:%02d", tm->tm_hour, tm->tm_min);

  matrix.setFont();
  matrix.printf(":%02d", tm->tm_sec);


  matrix.setCursor(2, 16);
  matrix.setTextColor(matrix.color444(b, r, g));

  matrix.printf("%s", wd[tm->tm_wday]);


  matrix.setCursor(2, 24);
  matrix.setTextColor(matrix.color444(g, r, b));

  r = (r + 3) % 31;
  g = (g + 3) % 31;
  b = (b + 3) % 31;

  matrix.printf("%04d/%02d/%02d\n", tm->tm_year+1900, tm->tm_mon+1, tm->tm_mday);

}
코드 살펴보기
#include <WiFi.h>
#include <Adafruit_GFX.h>
#include <P3RGB64x32MatrixPanel.h>
#include <Fonts/FreeSans9pt7b.h>

P3RGB64x32MatrixPanel matrix(25, 26, 27, 21, 22, 0, 15, 32, 33, 12, 5, 23, 4);

char ssid[] = "frontier";
char pass[] = "front1202^^";
우선 필요한 헤더 파일을 포함합니다.
모듈에 맞는 핀 번호를 설정해줍니다.
( ※ ESP32-WROVER-E 모듈 적용 )
다음 접속할 무선 네트워크(WIFI)의 접속 정보를 자신의 환경에 맞게 넣습니다.
ex) 무선 네트워크 이름(SSID): "KibMango"
무선 네트워크 비밀번호(PASSWORD): "#kibmango"
void setup(){
  Serial.begin(115200);

  Serial.print("Attempting to connect to Network named: ");
  Serial.println(ssid);                   // print the network name (SSID);

  WiFi.begin(ssid, pass);
  while (WiFi.status() != WL_CONNECTED) {
    Serial.print(".");
    delay(1000);
  }
  Serial.println("");
  IPAddress ip = WiFi.localIP();
  Serial.print("IP Address: ");
  Serial.println(ip);

  configTime(32400, 0, "ntp.nict.jp", "ntp.jst.mfeed.ad.jp"); // enable NTP
   matrix.begin();
}
setup() 함수를 살펴보겠습니다.
결과 확인을 위해 시리얼 모니터를 시작하고, 주어진 정보를 이용하여 WiFi를 시작합니다.
무선 네트워크 접속 코드를 보면
WiFi.status() 함수를 체크하여 접속이 성공(WL_CONNECTED)하는지 판단합니다.
만약 와이파이 접속이 실패하면 시리얼 모니터에 ......이 찍힙니다.
( 시리얼 모니터는 아두이노IDE 우측 상단에 있습니다. )
void loop()
{
  if (WiFi.status() != WL_CONNECTED)
    ESP.restart();

  time_t t;
  static time_t last_t;
  struct tm *tm;
  static const char* const wd[7] = {"Sun","Mon","Tue","Wed","Thr","Fri","Sat"};

  t = time(NULL);
  if (last_t == t) return;    // draw each second
  last_t = t;
  tm = localtime(&t);
  matrix.fillScreen(0);

  matrix.setFont(&FreeSans9pt7b);
  matrix.setCursor(0, 13);
  matrix.setTextColor(matrix.color444(15, 15, 15));

  matrix.printf("%02d:%02d", tm->tm_hour, tm->tm_min);

  matrix.setFont();
  matrix.printf(":%02d", tm->tm_sec);


  matrix.setCursor(2, 16);
  matrix.setTextColor(matrix.color444(b, r, g));

  matrix.printf("%s", wd[tm->tm_wday]);


  matrix.setCursor(2, 24);
  matrix.setTextColor(matrix.color444(g, r, b));

  r = (r + 3) % 31;
  g = (g + 3) % 31;
  b = (b + 3) % 31;

  matrix.printf("%04d/%02d/%02d\n", tm->tm_year+1900, tm->tm_mon+1, tm->tm_mday);

}
loop() 함수를 살펴보겠습니다.
matrix.setFont(); // 글자 크기, 종류 설정
matrix.fillScreen(0); // matrix 화면 깨끗하게(초기화) 설정
matrix.setCursor(0, 13); // 글자가 시작되는 위치 (x-15, y-10)
matrix.printf(); // 해당되는 내용을 화면에 출력
struct tm 구조체
- tm_sec 초를 나타냅니다. 범위는 0~59.
- tm_min 분을 나타냅니다. 0~59.
- tm_hour 시간을 나타냅니다. 0~23.
- tm_mday 날짜를 나타냅니다. 1~31.
- tm_mon 월을 나타냅니다. 0~11. 실제는 +1을 해야합니다.
- tm_year 년도를 나타냅니다. years since 1900. 실제 사용 시 +1900을 해야 합니다.
- tm_wday 요일을 나타냅니다. 0~6.
  int r = 0, g = 3 , b = 6;

  matrix.setTextColor(matrix.color444(g, r, b));

  r = (r + 3) % 31;
  g = (g + 3) % 31;
  b = (b + 3) % 31;
matrix.setTextColor(); // 글자 색상 적용
글자 색상을 지속적으로 변경시키기 위해 r,g,b 변수를 이용했습니다.
matrix.color444(15,15,15)는 white색 입니다.
'62x32 LED MATRIX 예제 > 초 단위 시계 구현하기' 카테고리의 다른 글
| [62x32 LED 매트릭스 예제] NTPClock (5) | 2021.01.07 |
|---|

댓글