
예제의 결과물

준비물 & 결선 & 세팅하기
아래 링크를 참고해서 준비해주세요.
* 준비물 구입 링크
https://smartstore.naver.com/frontiers/products/5380911083
스마트폰제어 LED 간판 오픈 입구 전광판 아트사인 부동산 전광판 영업중 개업선물 카페 식당 :
스마트폰과 블루투스 연결을 통해 글자와 이미지를 마음대로 변경
smartstore.naver.com
소스코드 다운
iotfrontiers/popsign_examples (github.com)
GitHub - iotfrontiers/popsign_examples
Contribute to iotfrontiers/popsign_examples development by creating an account on GitHub.
github.com
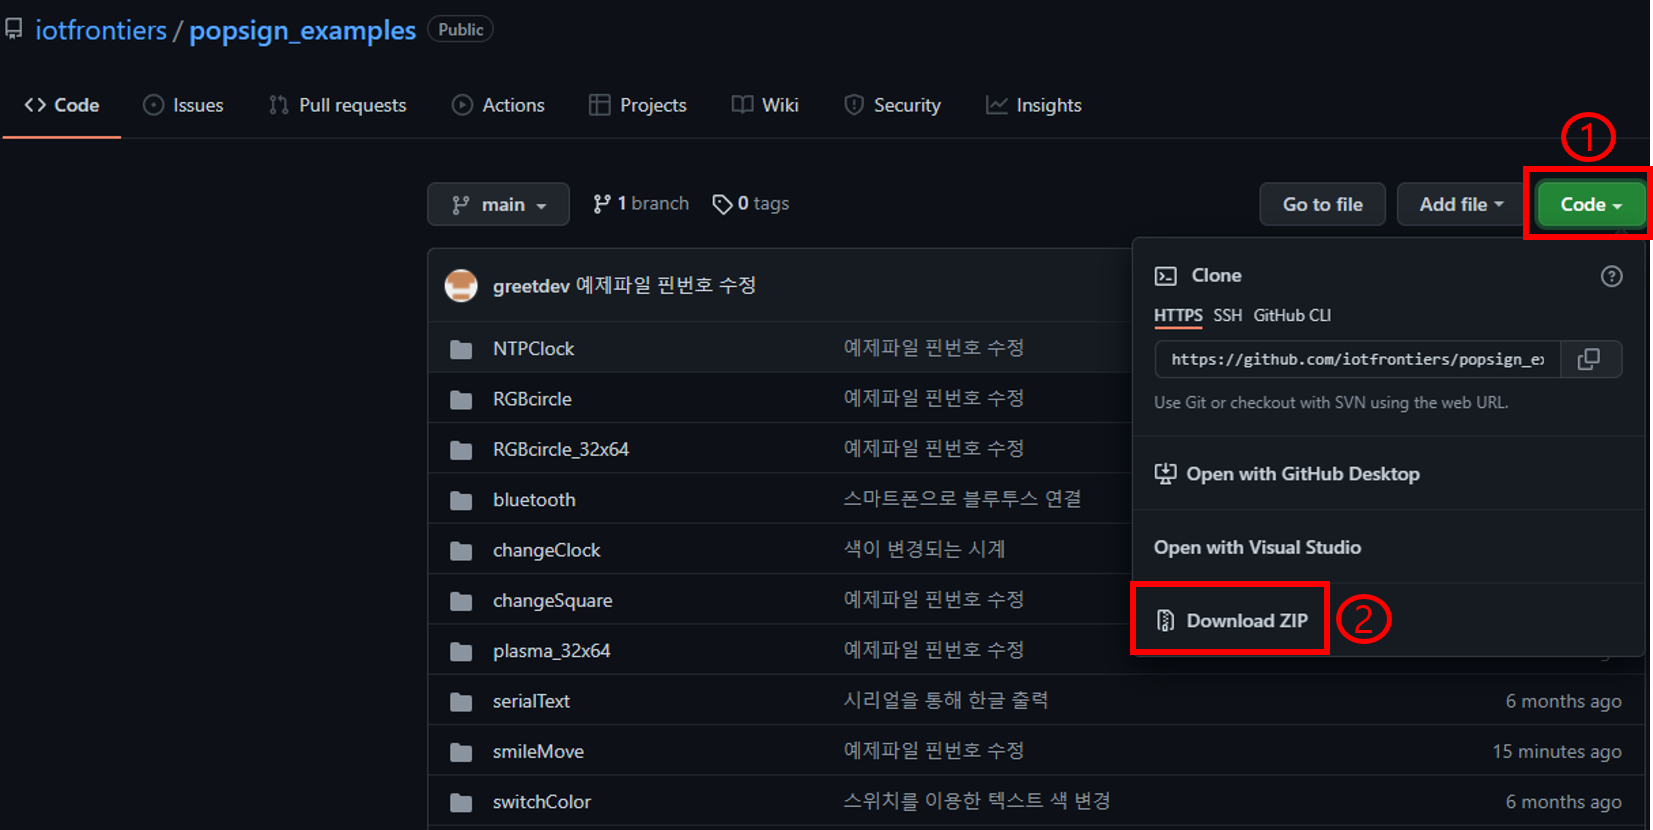
위 링크에 들어가셔서 연두색의 Code 버튼을 누르시고
Download ZIP 버튼을 누르면 전체 예제 파일을 다운 받을 수 있습니다.
업로드 준비
① 파일 - 열기 항목을 눌러서 현재 진행하고 있는 예제의 ino파일을 선택합니다.
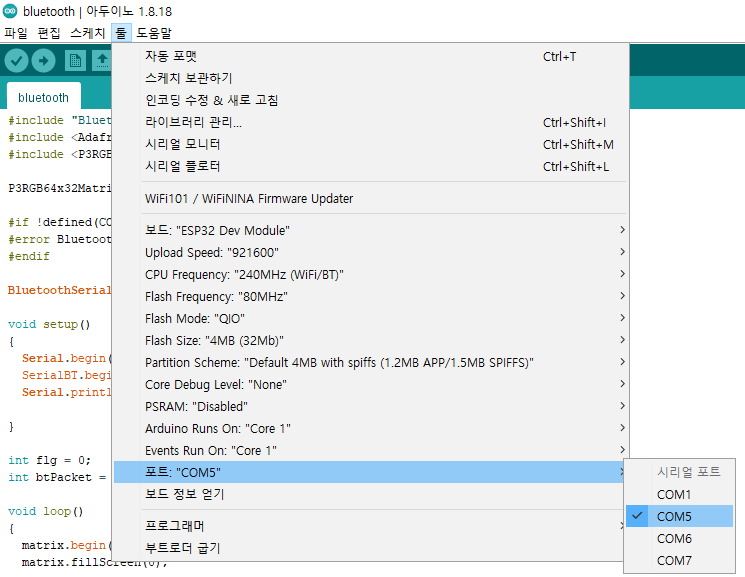
② 보드와 PC를 USB C타입 케이블로 연결합니다.
③ 장치관리자에서 보드가 연결된 포트를 확인합니다. USB-SERIAL-CH340 이라는 이름으로 표시되어 있습니다.

④ 위에서 확인한 포트번호를 IDE에 설정합니다
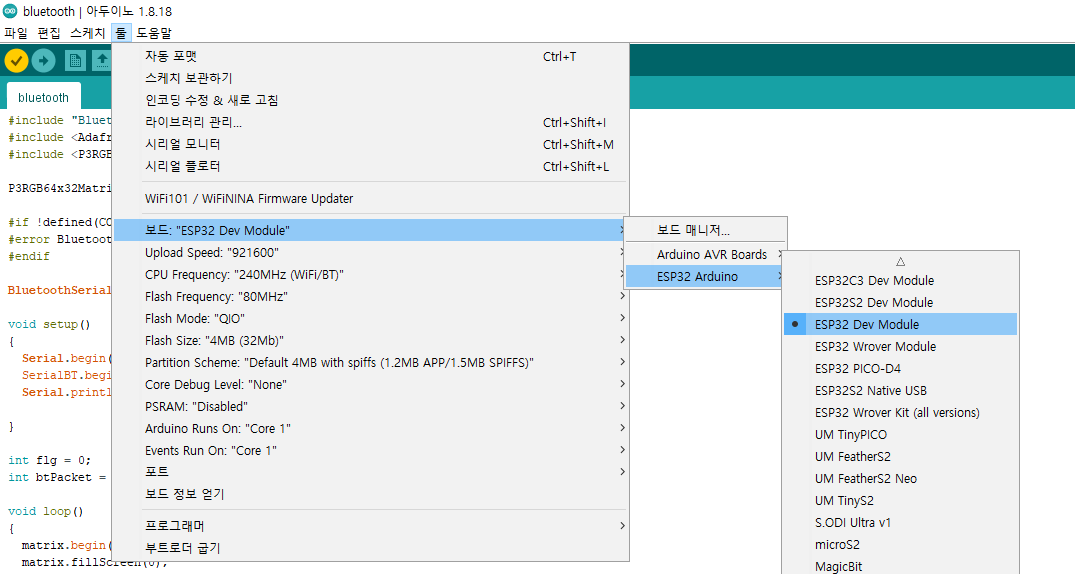
⑤ ESP-32 Dev Module 보드를 선택합니다.
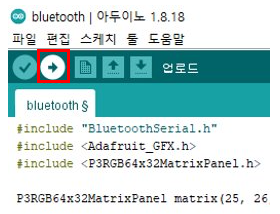
⑥ 업로드 준비가 다 되었습니다. 업로드 버튼을 눌러서 업로드 할 수 있습니다.
시리얼 모니터
스케치 우측상단 돋보기 모양을 선택하면 시리얼 모니터를 실행할 수 있습니다.
시리얼 모니터의 보드레이트를 코드상에서 설정한 보드레이트 (115200) 와 동일하게 설정해야 합니다.
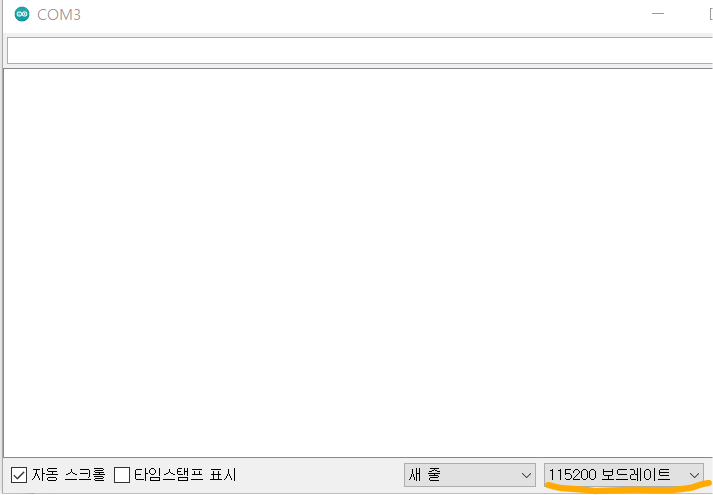
시리얼 모니터를 통해 보드가 컴퓨터로 보내는 내용을 볼 수 있고
전송 버튼 왼쪽에 있는 입력 창에 텍스트를 입력한 후 전송 버튼을 눌러서 보드로 내용을 전송할 수도 있습니다.
이 예제에서는 보드가 블루투스로 연결 된 후 블루투스로 무언가 값이 들어오면
그 값을 시리얼로 컴퓨터로 전송하고 LED 매트릭스에 "Bluetooth OK!" 를 표시하고 있습니다.
bluetooth 소스코드
#include "BluetoothSerial.h"
#include <Adafruit_GFX.h>
#include <P3RGB64x32MatrixPanel.h>
P3RGB64x32MatrixPanel matrix(25, 26, 27, 21, 22, 0, 15, 32, 33, 12, 5, 23, 4);
#if !defined(CONFIG_BT_ENABLED) || !defined(CONFIG_BLUEDROID_ENABLED)
#error Bluetooth is not enabled! Please run `make menuconfig` to and enable it
#endif
BluetoothSerial SerialBT;
void setup()
{
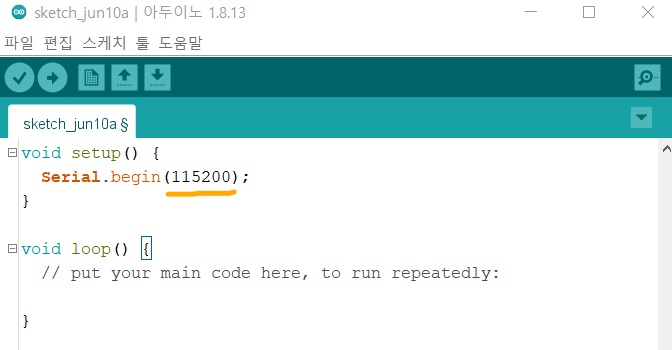
Serial.begin(115200);
SerialBT.begin("ESP32test"); //Bluetooth device name
Serial.println("The device started, now you can pair it with bluetooth!");
}
int flg = 0;
int btPacket = 0;
void loop()
{
matrix.begin();
matrix.fillScreen(0);
while (SerialBT.available())
{
Serial.println("connect");
flg = 1;
btPacket = SerialBT.read();
Serial.printf("btPacket : %d \n", btPacket);
matrix.setCursor(3, 8);
matrix.print("Bluetooth OK!");
}
if (!SerialBT.hasClient() && flg == 1)
{
Serial.println("disconnect");
flg = 0;
matrix.fillScreen(0);
matrix.setCursor(3, 8);
matrix.print("Bluetooth Fail!");
}
delay(3000);
}
코드 살펴보기
두 장치간에 Bluetooth 통신을 설정하기 위한 과정들을 살펴보겠습니다.
#include "BluetoothSerial.h"BluetoothSerial 라이브러리를 포함합니다.
#if !defined(CONFIG_BT_ENABLED) || !defined(CONFIG_BLUEDROID_ENABLED)
#error Bluetooth is not enabled! Please run `make menuconfig` to and enable it
#endif
위에 내용은 Bluetooth가 제대로 활성화되었는지 확인합니다.
BluetoothSerial SerialBT;
SerialBT 라는 BluetoothSerial 인스턴스를 만듭니다.
void setup()
{
  Serial.begin(115200);
  SerialBT.begin("ESP32test"); //Bluetooth device name
  Serial.println("The device started, now you can pair it with bluetooth!");
}
setup() 함수를 살펴보겠습니다.
Serial.begin(115200); // 115200의 속도로 아두이노와 통신합니다.
SerialBT.begin("ESP32test"); // 블루투스 이름은 ESP32test 입니다. 새로 이름을 지정할 수 있습니다. Serial.println("The device started, now you can pair it with bluetooth!"); // 시리얼 모니터에 찍히는 내용입니다.
 while (SerialBT.available())
  {
    Serial.println("connect");
    flg = 1;
    btPacket = SerialBT.read();
    Serial.printf("btPacket : %d \n", btPacket);
    matrix.setCursor(3, 8);
    matrix.print("Bluetooth OK!");
  }

  if (!SerialBT.hasClient() && flg == 1)
  {
    Serial.println("disconnect");
    flg = 0;
    matrix.fillScreen(0);
    matrix.setCursor(3, 8);
    matrix.print("Bluetooth Fail!");
  }
loop() 함수를 살펴보겠습니다.
첫 번째 while 문에서 SerialBT가 가능한지를 계속 확인하고 있습니다.
블루투스로 데이터가 들어온 경우 그 데이터를 Serial로 연결된 포트로 보내고 있습니다.
!SerialBT.hasClient() && flg == 1
처음 연결 끊긴 상태가 아닌 연결된 후 끊겼을 때를 나타냅니다.
출력 메세지는 Bluetooth Fail! 입니다.
댓글